How to Take a Passport Photo on Your Phone – A No-Mistake Guide
Taking a passport size photo might seem like a mundane task, but if you get it wrong, it can cost you time, money, and a lot of frustration. Did you know that even a slight shadow on your face or a crooked background can lead to a rejected photo? Don’t worry—we’ve got you covered. In this guide, we’ll walk you through everything you need to know to snap a perfect passport size photo using just your phone. Yes, you read that right—no professional studio required.
Why Taking Your Own Passport Photo is Worth It
Let’s face it: going to a professional photo studio can be a hassle. Between commuting, waiting in line, and trying to coordinate schedules, what should be a simple task often turns into a time-consuming chore. By taking your own passport photo at home, you eliminate all of that stress. You can choose the exact time of day that works best for you, control the lighting, and even take breaks between shots if needed. This convenience factor alone makes DIY passport photos an attractive option, especially for people with busy schedules or those who live far from professional studios.
Another significant benefit is the cost savings. Professional passport photos typically range from $10 to $25 per set, depending on where you go. While that may not seem like a lot, it adds up if you need multiple copies or if your photo gets rejected for not meeting the standards. Taking a photo with your phone is virtually free, aside from the minor cost of printing if required. In other words, you can achieve a professional-quality photo without spending a fortune, which makes financial sense for students, frequent travelers, or anyone looking to save some extra cash.
Control over the photo itself is another major advantage. When you take your own passport photo, you decide everything—from the background and lighting to your expression and clothing. Studio photographers may rush the process, limiting your options and leaving you with a photo that doesn’t feel right. At home, you can experiment with angles, natural light, and even slight adjustments to your posture until you capture the perfect shot. This level of control ensures your photo not only meets official requirements but also represents you in the best possible way.
Finally, taking your own passport photo is a learning experience in itself. Think of it like cooking at home instead of dining out—you might make a few mistakes along the way, but each attempt teaches you something new. You’ll learn how to manage lighting, framing, and positioning, skills that can be useful for other types of photos too, from LinkedIn headshots to family portraits. Plus, there’s a sense of satisfaction in completing the task yourself and knowing that the finished product is entirely your own work. In short, DIY passport photos offer convenience, savings, control, and a small but rewarding skill-building experience.
Passport Photo Requirements You Must Know
| Requirement Category | Details | Measurements/Specs | Do’s | Don’ts |
| Photo Size | Standard passport photo dimensions | 2 x 2 inches (51 x 51 mm) | Ensure photo is exactly 2 x 2 inches | Don’t crop incorrectly or resize unevenly |
| Head Size | Face size in photo | 1 to 1 3/8 inches from chin to top of head | Center head in frame, adjust camera distance | Don’t let head be too small or too large |
| Resolution | Digital photo quality | Minimum 300 dpi | Use a high-quality camera or smartphone | Don’t use blurry or low-resolution images |
| Background | Background requirements | Plain white or off-white | Use a blank wall, sheet, or backdrop | No patterns, shadows, furniture, or objects behind you |
| Expression & Eyes | Facial expression and eye visibility | Neutral expression, eyes open, mouth closed | Look straight at the camera with relaxed face | No smiling, frowning, raised eyebrows, or closed eyes |
| Clothing | Dress code for photo | Everyday attire | Wear solid colors and regular clothing | No uniforms, camouflage, or flashy patterns; religious headwear only if worn daily |
Choosing the Right Phone for the Job
Not all phones are created equal. The quality of your camera can make or break your passport photo, so choosing the right device is essential. Here’s a detailed breakdown of what to look for and some recommended models:
- Minimum Camera Specifications: At the very least, your phone should have an 8-megapixel rear camera to ensure sharp, clear images. Low-resolution cameras can produce blurry or pixelated photos, which are often rejected by passport authorities. Additionally, your camera should have good autofocus capabilities so that your face is perfectly in focus, even when taking the shot yourself. Another important factor is low-light performance. Many rooms at home do not have perfect lighting, so a camera that performs well in dim conditions will help avoid shadows and grainy photos.
- High-Resolution Cameras: If you have the option, choose a phone with a higher megapixel count, such as 48 MP or 50 MP. These phones capture finer details, ensuring that features like your eyes, eyebrows, and facial contours are clearly visible. Higher resolution also allows for better cropping without losing quality, which is particularly useful when adjusting your photo to meet the official size requirements.
- AI and Image Processing: Modern phones like the iPhone 15, Samsung Galaxy S23, and Google Pixel 8 come with AI-enhanced cameras that automatically optimize lighting, exposure, and contrast. This technology can make your photo look more professional, even if your home lighting isn’t perfect. AI face detection helps ensure that your face remains centered and correctly exposed, which is critical for passport photos.
- Recommended Phone Models:
- iPhone 15 – 48 MP main camera with advanced AI processing. Ideal for clear, crisp photos with natural colors.
- Samsung Galaxy S23 – 50 MP main camera with night mode. Excellent for low-light conditions and flexible lighting setups.
- Google Pixel 8 – 50 MP camera with AI face detection. Perfect for auto-correction, ensuring proper alignment and exposure.
- Rear Camera Over Front Camera: Always use the rear camera for your passport photo. Front-facing cameras, commonly used for selfies, can distort facial features and produce uneven lighting. The rear camera typically has higher resolution and better sensors, resulting in a sharper, more accurate image.
- Additional Features to Consider: Some phones offer portrait mode or built-in gridlines, which help keep your head centered and ensure proper alignment. Optical image stabilization is another useful feature, as it reduces blur from small hand movements while taking the photo. Even a tripod or a stable surface will benefit from these features for the clearest possible image.
Finding the Perfect Spot at Home
You might not realize it, but the environment where you take your passport photo has a huge impact on the final result. Lighting, background, and camera positioning all play a crucial role in producing a photo that meets official standards. Using a passport photo maker app can help guide you through some of these adjustments, but the physical setup is just as important. Natural daylight is your best friend when it comes to photography. Set up near a window where soft, indirect light falls evenly on your face. Avoid harsh overhead lights or lamps that cast shadows, as these can distort facial features and lead to rejected photos.
The background is equally important. Passport authorities require a plain white or off-white background, so you need to eliminate any distractions. A blank wall works perfectly, but if you don’t have one, hanging a white sheet can serve as an alternative. Make sure the background is free from furniture, decorations, or patterns that could draw attention away from your face. Ideally, keep at least three feet between yourself and the background to prevent shadows and achieve a clean, professional-looking result. Many passport photo maker apps will check for proper background contrast, but it’s best to get it right physically first.
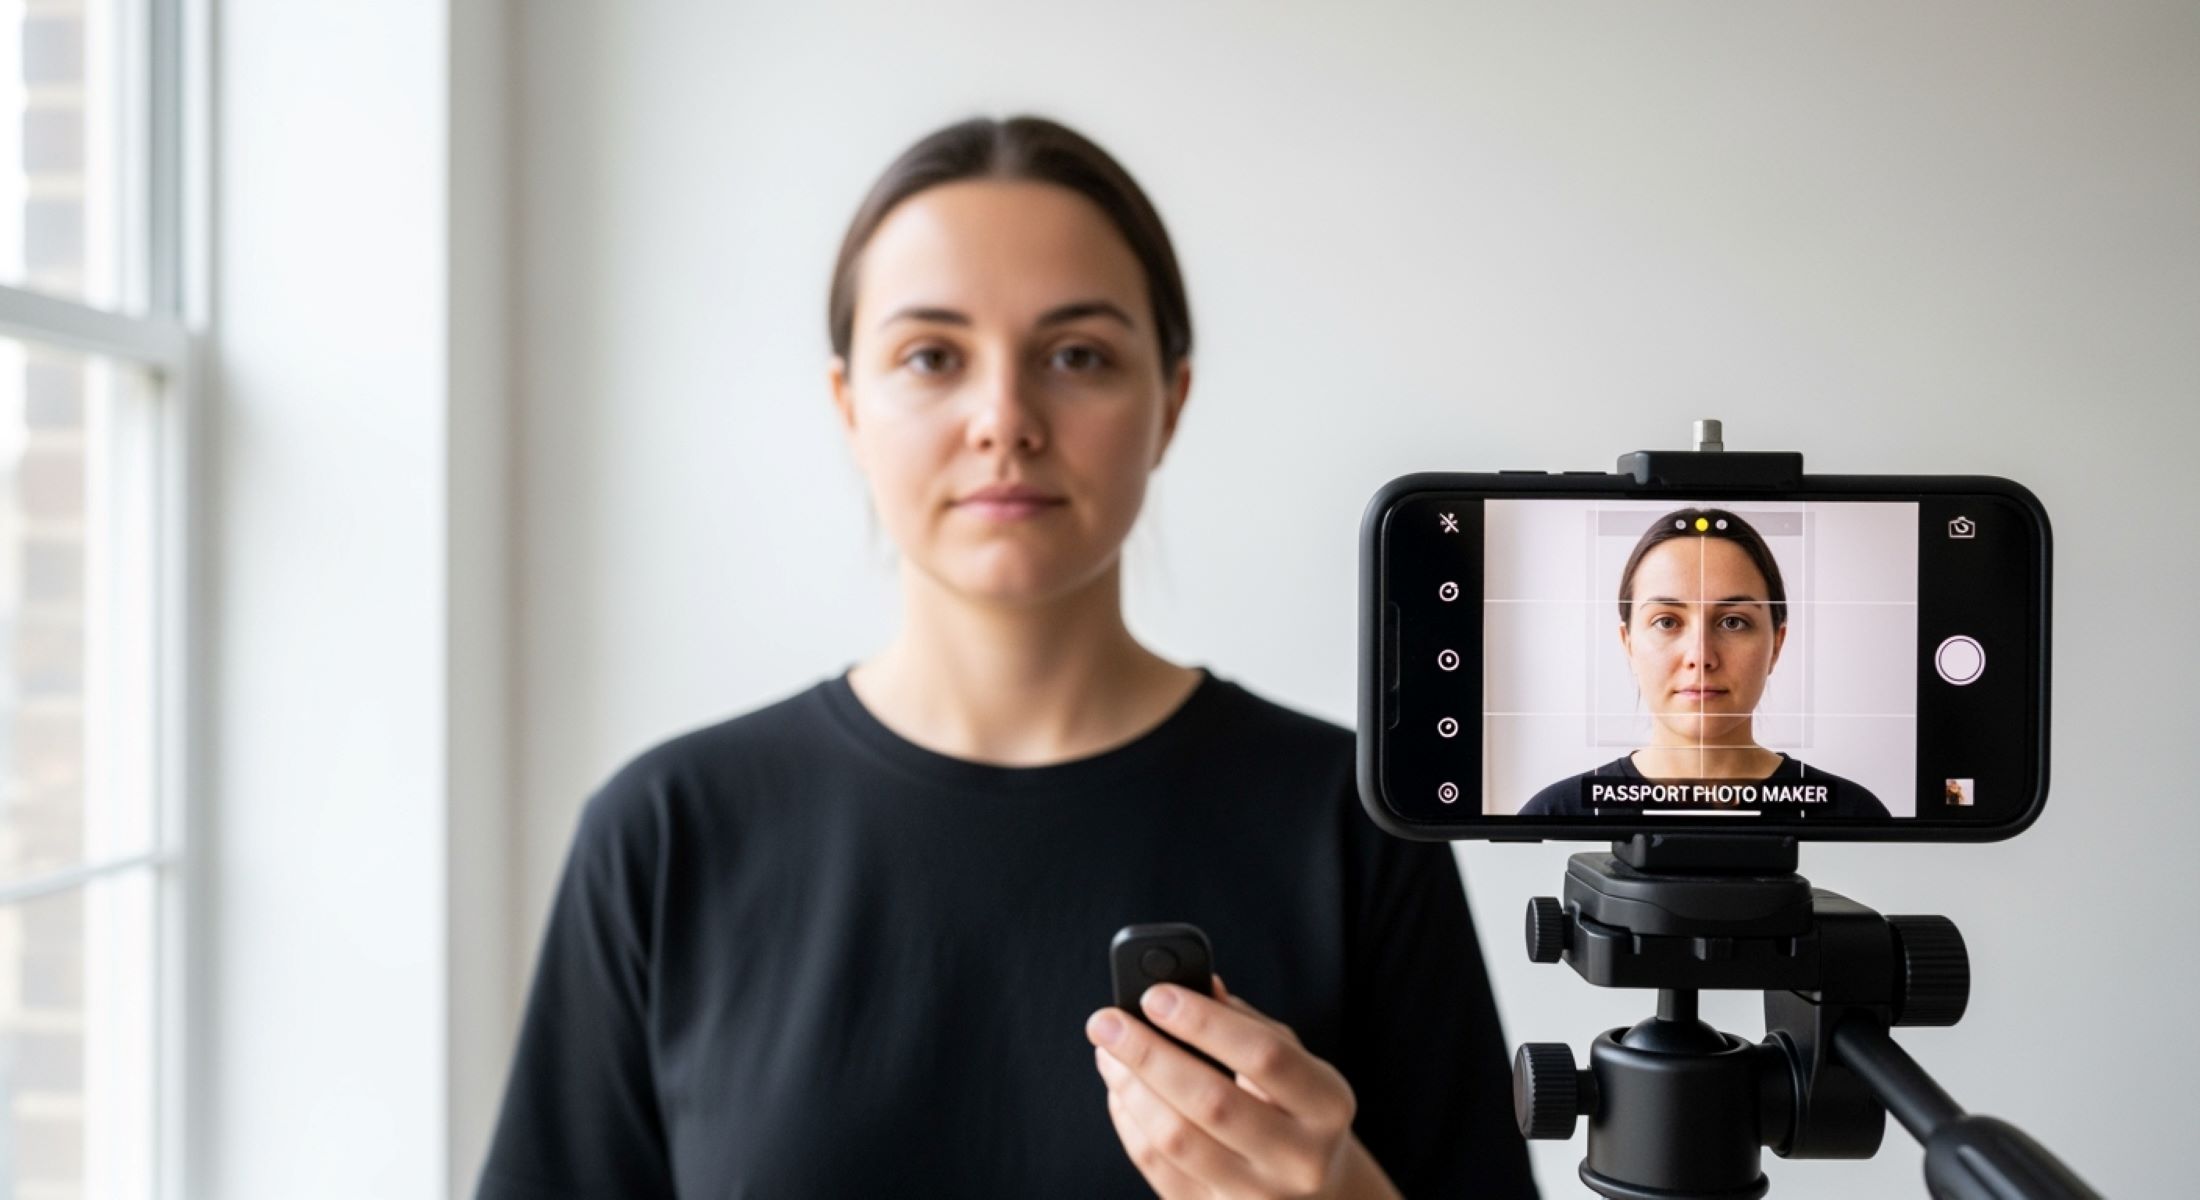
Camera positioning is another critical factor. The camera should be at eye level and facing straight toward you—no tilted angles or awkward perspectives. Using a tripod, a stack of books, or any stable surface can prevent shaking and help maintain consistent framing. If you’re taking the photo yourself, set a timer or use a remote shutter. This allows you to step back, relax your posture, and focus on maintaining a neutral expression without worrying about holding the phone. A passport photo maker app can help ensure the head is centered and the face is correctly sized, but proper camera alignment makes the biggest difference.
Finally, small adjustments in your environment can dramatically improve the final photo. Experiment with slight changes in distance from the light source, or move a few inches closer or farther from the background to minimize shadows. Make sure your face is evenly lit and the background remains plain and consistent. Using a passport photo maker app alongside these physical adjustments helps you preview the results and instantly correct any issues before submission. By taking the time to set up your environment carefully, you maximize your chances of producing a passport photo that is not only compliant with regulations but also visually professional.
Preparing Yourself for the Shot
| Category | Details | Do’s | Don’ts | Tips |
| Hair & Makeup | Hair should be neat and away from the face. Minimal makeup is recommended to avoid glare. Avoid glittery or reflective products. | Keep hair tucked behind ears or pinned back. Use matte makeup if necessary. | Don’t cover your face with hair or use sparkly/high-gloss products. | Check lighting to make sure hair doesn’t cast shadows. |
| Clothing | Solid colors work best and contrast slightly with the background. Avoid hats, sunglasses, or clothing that looks like uniforms. | Wear everyday attire in neutral or solid colors. | No stripes, patterns, hats, sunglasses, or uniforms. | Avoid colors that blend into the background, especially white. |
| Expression | Maintain a neutral expression with eyes open and mouth closed. Look straight at the camera. | Relax your face and shoulders. Keep a calm, neutral expression. | No smiling, frowning, raised eyebrows, or tilting your head. | Practice in front of a mirror to find your natural neutral look. |
| Posture | Sit or stand up straight to create a balanced and professional photo. | Keep shoulders relaxed and back straight. | Don’t slouch, lean, or twist your body. | Position yourself evenly in the frame with your head centered. |
| Accessories & Other Details | Minimize distractions around your face. Glasses, jewelry, or headgear (unless religious) can affect the photo. | Remove glasses, headphones, and unnecessary jewelry. | Don’t wear sunglasses, large earrings, or hats (unless religious). | Use a passport photo maker app to preview your image and ensure everything is aligned properly. |
Using Your Phone Camera Like a Pro
Your phone is a powerful tool, but it needs proper guidance to produce a passport photo that meets official standards. Here’s how to get the most out of your smartphone camera:
- Adjust Camera Settings: Start by turning on HDR (High Dynamic Range) mode if your phone supports it. HDR balances lighting across the photo, preventing bright spots and shadows that could obscure your face. Enable grid lines in your camera settings to help align your face in the center of the frame and maintain proper proportions. If your phone has portrait mode, use it to gently blur the background while keeping your face in sharp focus.
- Focus on Composition: Proper composition ensures your head and shoulders are fully visible and meet official passport photo guidelines. Keep your head centered in the frame, with your eyes roughly on the upper third line according to the rule of thirds. Include your shoulders in the photo, not just your face, to maintain the correct proportions. Avoid tilting your phone or positioning it too high or too low, as this can distort facial features and lead to rejection.
- Take Multiple Shots: Don’t settle for a single photo. Take at least 5–10 shots to increase the chances of getting a perfect one. Slightly adjust angles, distance, and lighting between shots to see what works best. Minor changes can drastically improve shadows, facial clarity, and background uniformity. Taking multiple photos also allows you to compare them side by side and select the one that perfectly meets the official requirements.
- Check Details Before Finalizing: After capturing your photos, review each one carefully. Ensure your face is well-lit, centered, and properly sized. Look for shadows, reflections, or slight tilts that may compromise the quality. If using a passport photo maker app, upload your best shots to preview how they align with official guidelines and crop or adjust as needed. This step is crucial for avoiding unnecessary rejections.
- Additional Tips for a Professional Finish: Keep your lens clean to avoid smudges or blurry spots. Stabilize your phone on a tripod, stack of books, or flat surface to prevent shaking. Position yourself a few feet from the background to reduce shadows. Experiment with natural light from different angles, and remember that patience is key—you want a crisp, neutral, and compliant photo that looks professional.